The Windows Admin Center is a free web-based management console that you can use to manage remote servers, computers, and services, including virtual machines hosted in Microsoft Azure. Windows Admin Center has two core components that enable you to manage remote devices and services:
- Gateway Enables you to manage servers through Windows PowerShell Remoting and WMI using WinRM.
- Web server Enables management through standard HTTPS communications.
Windows Admin Center Installation
To use Windows Admin Center, you must first download the current version from the Microsoft Download website at https://aka.ms.downloadWAC.
After downloading, run the Windows Admin Center msi installation program. Then use the following procedure to complete the setup:
- In the Windows Admin Center Setup Wizard, accept the software license and select Next.
- On the Install Windows Admin Center on Windows 10 page, select Next.
- On the Send diagnostic data to Microsoft screen, choose Required diagnostic data or Required and optional diagnostic data and select Next.
- On the Use Microsoft Update to help keep your computer secure and up-to-date page choose one of the two options then select Next.
- On the Install Windows Admin Center page, select Next.
- On the Installing Windows Admin Center page, select a port for the Windows Admin Center site, enter a suitable TCP port, and select Next. The default port is 6516. This port is used to communicate with the Windows Admin Center.
- Select the Allow Windows Admin Center to modify this machine’s trusted hosts settings checkbox if you want to manage computers that are not part of your AD DS forest. See more information about authentication in the next section.
- Select Install. Accept the User Access Control (UAC) prompt.
- When you see the prompt, select Finish.
- After installation, launch the Windows Admin Center. You are prompted for a certificate when you run Windows Admin Center for the first time. Select the Windows Admin Center Client certificate, as displayed in Figure 1-21, and select OK.
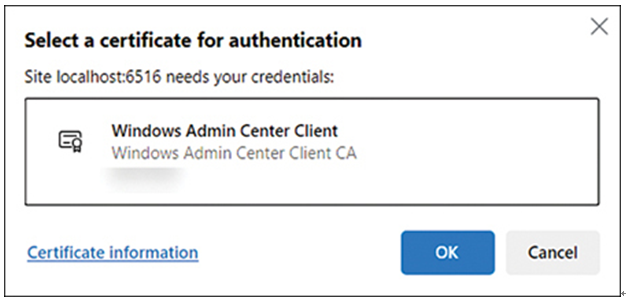
FIGURE 1-21 Windows Admin Center certificate
- Accept the UAC prompt to allow the Windows Admin Center Client to change your device.
Authentication
You must authenticate with the remote computer if you connect to remote computers, either with Windows Admin Center or Windows PowerShell remoting (covered in the next skill). If your two computers are part of the same AD DS forest, Kerberos authentication automatically occurs. However, if you connect to computers in a different forest or non-domain-joined computers, you must configure the TrustedHosts settings to allow the devices to communicate securely.If you accept the defaults, then the TrustedHosts are set to be automatically configured. However, if you want to manage these settings manually, you do so by using Windows PowerShell using these steps.
- Open an elevated Windows PowerShell prompt.
- Run the following command.
Click here to view code image
Set-Item WSMan:localhost\Client\TrustedHosts -Value ‘svr1.Contoso.com’ - When prompted, enter Y to confirm the change.
- For each device you want to manage, run the preceding command, remembering to change the computer name specified in the value parameter.
- You can also use a wildcard to enable connectivity to any computer. Run the following command.
Click here to view code image
Set-Item WSMan:\localhost\Client\TrustedHosts -Value ‘*’